The Overworld: How to create a map in Unity with Tiled2Unity
Creating a map for CYF is not that difficult. All that you need to do is follow the rules. There are a lot of them, but as long as you stick to them, you'll be fine.
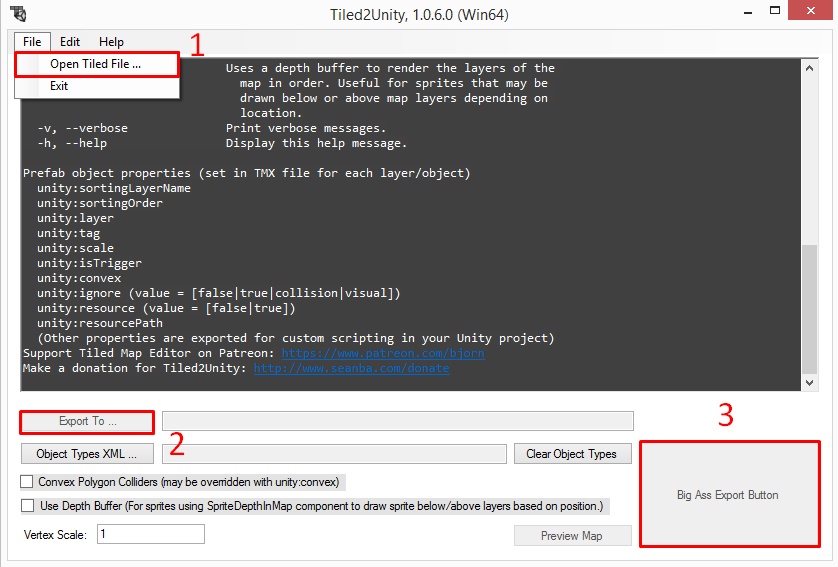
The very first step is to create the map in Tiled, and save it.
Tip: Undertale's tiles are 20x20 pixels, with a scale factor of 2: I suggest for you to
make a tileset of 40x40px tiles so you will not have to worry about scaling.
If Unity asks you if you want to break the prefab, say "Yes".
Tips:
- Put all of Background's children in the root or as the children of another object, so that their position isn't changed while the background moves.
- Then, Background's RectTransform size will be equal to (the bounds of the map / 100) - so, if your map is 640x480, the size will be 6.4 by 4.8.
- Now, center the main map object to make it fit inside of Background's RectTransform.
- Don't forget that Background's RectTransform's bottom-left corner must be at the same coordinates as the Main Camera OW's RectTransform's bottom-left corner!
- Now, when everything is all done, put Background's old children back to their original places as Background's children.
NOTE: The absolute minimum size for a map for the camera to function properly is 640x480.
Set Background's Z value to 140, then play around this value to set the Z value of other background layers (between 139 and 141; you can use decimal numbers, of course).
For foreground layers' Z values, you should use values between -1.5 and -0.5.
Warning: The maps' Z value must be set to 0 after setting the layers' Z values!
- Scene Name = Name of the destination scene of the TP.
- Position = Position of the player in the destination map, from the bottom-left corner of the map.
- Direction = Direction the player will be facing after the TP. 2 = Down,
4 = Left, 6 = Right, 8 = Up.
(I used the NumPad for this, yeah ^^) - Activated = Boolean used when the TP is activated. Don't activate it manually!
Tip: Select the first one, then shift-click on the last one. Then, you can change the layer of all objects simultaneously!
- Music = Name of the BGM played on the map. The BGM must be in the Audio folder of the mod or the Default folder.
- Mod To Load = Name of the mod loaded by the map.
- Is Music Kept Between Battles = Makes the Overworld music keep playing during battles (like the CORE in Undertale). If unsure, leave unchecked.
- No Random Encounter = Check to disable random encounters on your map. If left unchecked, random encounters will occur, by randomly choosing an encounter .lua file from the mod set in Mod To Load. Will exclude any encounters whose names start with #.
Now, it's time to test it!
Your map is now ready! But it isn't playable yet...Before testing it, we'll need to add it to the Build.
When you're on your newly created map, open File --> Build Settings...
Click on the button Add Open Scenes while you're on your map. It should now be in the list of Scenes in the Build. It'll be built with the project and it can now be used!
- First Level To Load: Name of the first scene to load.
- Beginning Position = Position of the player in the first map, from the bottom-left corner of the map.
Start a new game if you've already saved.
You should now be in your map!
Run some tests on the map if there are problems.
If there are no problems, you can now move on to adding events!
If you had any problems with this tutorial, please tell me what went wrong.
If you see any ways that this tutorial can be improved, please tell me that as well.
You'll have more chances to contact me on Unitale's Discord server - the response will be way faster and it will be much
smoother than using messages on reddit.
Here is the link to the Discord server.
I hope that you enjoyed the tutorial! If you're ready to add an event, go to the next tutorial!